Children’s toy lifestyle photography is the practice of documenting toys in real-world settings through candid, child-led interaction. By prioritizing natural light and lived-in environments over sterile studio backdrops, this method creates a relatable narrative. It allows potential buyers to see the product’s scale, functionality, and emotional impact within a home context.
You have spent weeks perfecting a handcrafted wooden toy in your Sterling workshop, only to find that standard catalog photos feel cold and uninviting. When a parent browses your shop, they aren’t just looking for a climbing arch or a set of blocks; they are looking for a tool that encourages their child’s independence and fills their living room with warmth rather than plastic clutter. The disconnect between a static object on a screen and the dynamic reality of a child’s playroom often loses the sale.
Moving from a clinical studio setup to a lifestyle approach requires a shift in how you view the product. Instead of seeing the toy as the sole subject, you must view it as a participant in a story. This change in perspective helps small business owners in Northern Virginia bridge the gap between seeing a product and owning it.
How do you capture authentic lifestyle photos of children’s toys?
Capturing authentic imagery means stepping back and allowing the interaction to happen without heavy direction. Authentic children’s toy lifestyle photography relies on “prepared spontaneity,” where you set the stage with a safe, light-filled environment and let the child lead the play. This approach ensures that the joy or concentration on a child’s face is genuine, which creates an immediate emotional connection with your audience that a posed shot never could.
Natural lighting is the most vital element in this process. Positioning your scene near a large window in a Sterling home during the mid-morning or late afternoon provides soft, directional light that wraps around the toy’s textures. To master these lifestyle photography tips, avoid using a built-in flash, as it flattens the wooden grain and creates harsh shadows that distract from the “lived-in” feel. Instead, use a simple white foam board to bounce light back into the darker side of the toy, maintaining a soft balance.
Focus on the details of the interaction. A toddler’s hand reaching for a book on a low shelf or the way a child concentrates while stacking blocks tells a story of development and growth. You should vary your camera angles frequently; crawling on the floor to meet the child at eye level makes the toy feel substantial and important. This perspective draws the viewer into the child’s world, making the product feel like a natural extension of their daily routine.
- Keep the background tidy but real: A stray book or a soft rug is fine, but remove high-contrast clutter like bright plastic bins.
- Use a wide aperture: A lower f-stop (like f/2.8 or f/1.8) creates a shallow depth of field, blurring the background and making the toy pop.
- Patience is mandatory: Don’t force the child to hold the toy; wait for them to discover it on their own terms.
What are the best free tools to edit toy pictures on a Mac?
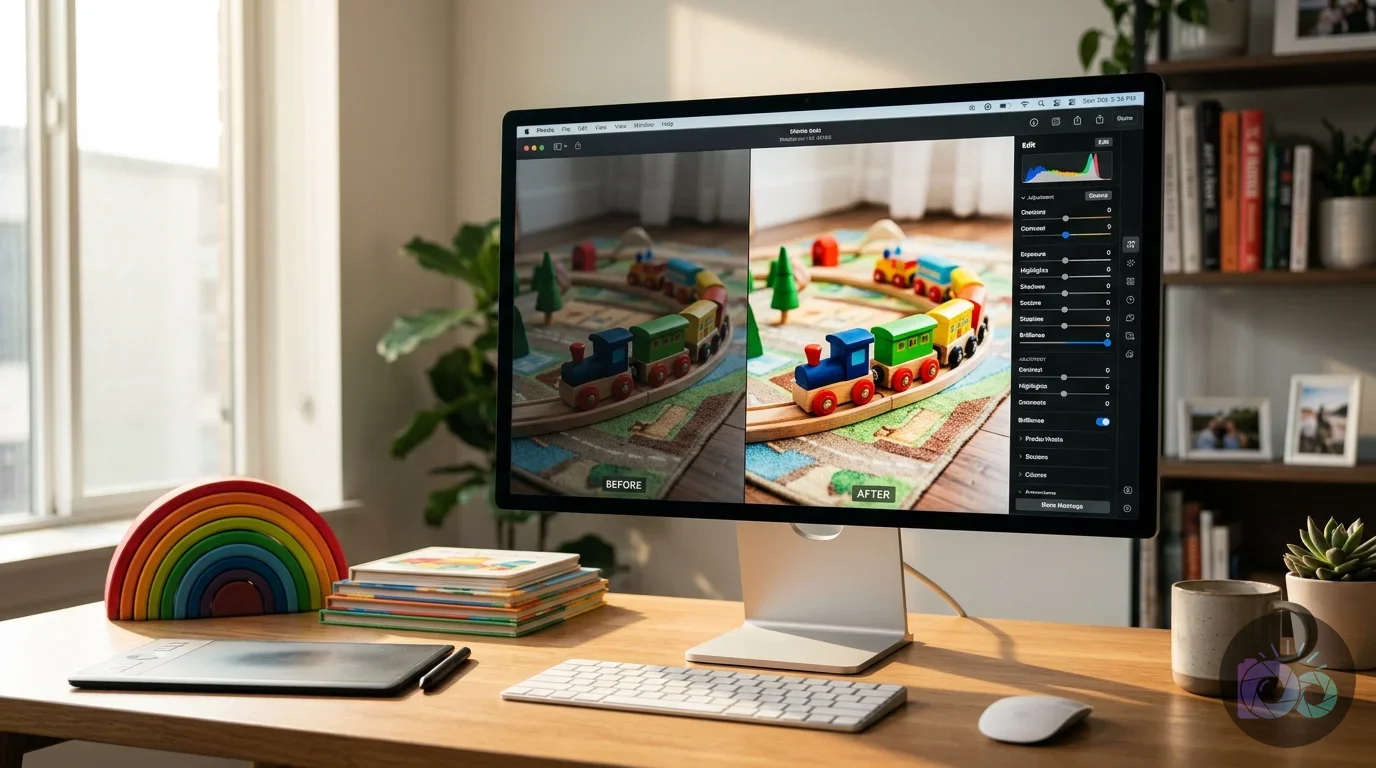
The best tools for editing toy pictures are those that allow you to enhance natural colors and fix exposure without making the image look over-processed. If you are using a Mac, you already have a powerful suite of tools built into the native Photos app. It handles RAW files and provides a sophisticated “Brilliance” slider that intelligently adjusts highlights and shadows to make lifestyle shots feel airy and bright. This is a foundational step to edit pictures on mac free while creating a consistent brand aesthetic.
For more specific tasks like social media optimization, you might need specialized web-based tools. If you find your background is too distracting, a free background remover can help you isolate the child and the toy for a clean marketing graphic. Additionally, once you have your perfect shot, you should use a free crop tool to ensure your images fit the specific aspect ratios required for Instagram or Facebook without losing important details in the frame. These tools provide professional results without the steep learning curve of expensive subscription software.
When editing, focus on color temperature. Wooden toys often look best with a slightly warm tint to emphasize the natural material, while “Montessori” aesthetics often lean toward a clean, neutral white balance. Use the “Definition” and “Sharpen” sliders sparingly; over-sharpening can make soft lifestyle photos look “crunchy” and artificial. Your goal is to make the photo look like a better version of reality, not a digital composite.
| Editing Goal | Mac Photos App Tool | Expected Result |
|---|---|---|
| Brighten shadows | Brilliance / Shadows | Brings out detail in dark wood or hair |
| Correct color cast | White Balance (Eyedropper) | Ensures whites look white, not yellow or blue |
| Add pop to colors | Saturation / Vibrance | Makes toy colors look rich and inviting |
| Direct viewer focus | Vignette (Slight) | Subtly darkens edges to keep focus on the center |
How can brands use lifestyle imagery to sell toys?
Brands use lifestyle imagery to communicate value without writing long paragraphs of text. A single photo of a child successfully navigating a climbing arch communicates safety, durability, and fun all at once. For e-commerce, these images act as “social proof” and “functional proof.” When a parent sees a children’s lifestyle photographer sterling va capture a local family using a product, it builds immediate trust. It shows that the toy is not just a digital render, but a physical object that exists and performs as promised in a real-world setting.
Versatility is another major selling point. In a single session, you can show a play tray being used for sensory play with sand, then as a floor table for drawing, and finally as a base for a rocketship activity board. This variety demonstrates that the product grows with the child, providing better long-term value. To keep your website running smoothly while displaying these high-quality images, always use an online image compressor before uploading. This ensures your beautiful lifestyle gallery doesn’t slow down your site’s loading speed, which is a major factor in mobile shopping conversions.
Identifying the three most common ways children play with your top-selling toy helps focus your content strategy. Schedule a mini-session at your home or a friend’s house in Sterling to capture those specific scenarios. By showing the toy in multiple contexts, you answer potential customer questions before they even ask them. This proactive visual communication is a powerful tool for increasing your conversion rate. You can find more strategies in our guide on AI product photography for e-commerce.
The first step is to stop thinking like a seller and start thinking like a parent. Parents typically worry about clutter, safety, and engagement. If your photos show a tidy, safe, and engaging play space, you have already won half the battle. High-quality imagery is an investment in your brand’s foundation that pays off every time a customer feels confident enough to click “Add to Cart.”
How do you style a Montessori-inspired toy shoot?
Styling for a Montessori-inspired brand requires a commitment to minimalism, order, and natural materials. A Montessori environment is designed to be accessible and uncluttered, promoting independence. When styling lifestyle product photography for toys, your setup should mirror these principles. Use low shelves, neutral wall colors, and organic textures like wool rugs or cotton fabrics to create a sense of calm. The toy itself should be the focal point of a “prepared environment” that looks ready for a child to walk in and begin working.
Include props that suggest a specific activity. If you are photographing a play tray, don’t just show it empty; place a few natural elements on it, such as large river stones or wooden counting beads. This demonstrates the toy’s versatility and helps the parent imagine how their child will use it. Avoid “busy” patterns in the child model’s clothing. Solid colors, linen textures, and earthy tones work best because they don’t compete with the toy for the viewer’s attention. The clothing should be comfortable and realistic for play, avoiding “Sunday best” outfits that feel stiff and out of place.
Movement is a key styling element. A “lived-in” look often includes signs of life that aren’t perfectly aligned. A toy that is slightly off-center or a chair that is pushed out suggests that a child was just there or is about to return. This creates a sense of narrative. You are not just selling a piece of furniture; you are selling the quiet moment of a toddler choosing their own book or the focus of a preschooler navigating a balance beam. This storytelling approach is what separates local Sterling brands from mass-market manufacturers.
“The environment must be a living one, directed by a higher intelligence, conditioned by a single unique will.” — Maria Montessori, The Discovery of the Child
- Select natural textures: Use wood, wool, and cotton rather than shiny plastics or synthetic fabrics in the background.
- Focus on accessibility: Place toys at a height where a child could realistically reach them.
- Limit the palette: Choose 2-3 main colors for the entire scene to keep the visual story cohesive.
- Use real-life settings: A bedroom or playroom in a real home carries more weight than a studio set.

What is the difference between commercial and lifestyle toy photography?
The primary difference lies in the intent and the environment of the shot. Commercial photography often focuses on the “what”—the technical specifications, the exact color, and the physical dimensions of the toy, usually shot against a plain white or solid color backdrop. On the other hand, lifestyle photography definition centers on the “why”—the emotional benefit, the developmental milestone, and how the toy fits into a family’s daily rhythm. Both are necessary for a successful e-commerce site, but they serve different parts of the customer journey.
In a commercial studio shot, the lighting is often “flat” and even to ensure every inch of the product is visible for a catalog. In lifestyle photography, the lighting is allowed to be more dramatic, with shadows and highlights that create depth and mood. For a small business in Sterling, VA, lifestyle images are often more cost-effective because they can be shot in a home or local park, removing the need for expensive studio rentals. These images are also far more effective for social media, where users respond better to human content than to blatant advertisements.
You should use commercial shots for your product pages where a customer needs to see exactly what they are buying. Use lifestyle shots for your homepage, “About Us” section, and social media feeds to build a brand identity. If you are just starting, you can learn more about product photography editing to help bridge the gap between these two styles, ensuring your lifestyle shots still have the clarity and polish of a commercial production.
Commercial vs. Lifestyle Comparison:
- Commercial: Isolated subject, white background, even lighting, focus on features.
- Lifestyle: Subject in context, real environment, natural lighting, focus on benefits and emotion.
- Hybrid Approach: Using a real home setting but with professional lighting and clean framing to meet both needs.
How do you style a toy photo for social media vs. a website?
Social media requires a “hook” that stops the scroll, whereas a website requires clarity and professional polish. For Instagram, you can be more creative with your composition. A “flat lay” of a toy surrounded by natural elements like leaves or wooden blocks works well for the square grid. For your website’s main banners, you need horizontal images with “negative space” where you can add text to the image without covering the main subject. This allows you to place your call-to-action or promotional headlines directly over a beautiful lifestyle scene.
Consistency is the expected result of how to style toy photos effectively. If your Instagram feed is dark and moody but your website is bright and white, customers will feel a “brand disconnect.” Choose a specific color palette and lighting style and stick to it across all platforms. Applying the same filter or editing preset to every photo you post creates a “signature look” that makes your brand instantly recognizable in a crowded feed.
Avoid using generic stock photos that look nothing like your actual products or the Northern Virginia area. Local customers can tell the difference between a generic studio kid and a real family in a Sterling neighborhood. Authenticity is your greatest asset as a small business. Using real names of children or mentioning the specific park where a photo was taken adds a layer of community connection that big-box retailers cannot replicate. This local flavor is a disqualifier for those looking for mass-produced, cheap toys, but a massive attractant for your target audience of intentional, Montessori-focused parents.
Checklist for Social Media Readiness:
- Check your ratios: 4:5 for Instagram portraits, 9:16 for Reels/Stories.
- Lighting check: Ensure the child’s eyes are bright and in focus.
- Background check: No distracting logos or bright trash cans in the frame.
- Engagement factor: Does the photo feel like a “peek” into a real moment?
To start improving your brand’s visual identity, take one toy today and photograph it in a well-lit corner of your living room using the “portrait mode” on your phone. Focus on the texture of the wood and the way the light hits it. Once you have that one great shot, use the basic editing tools on your Mac to brighten the image and sharpen the details. This small, practical step begins the transformation of your lifestyle product pictures into assets that look as high-end and intentional as the care you put into building them.
Transforming your product presentation through children’s toy lifestyle photography is about more than just aesthetics; it is about building a bridge of trust with parents who value quality and intentionality. By utilizing the free tools available on your Mac and focusing on natural, child-led interactions in your Sterling home, you can create a compelling narrative that resonates with your local community. Start by capturing one candid moment today, and you will see how authentic visual storytelling elevates your brand from a simple shop to a trusted partner in a child’s development.
If your next step is learn the gs1 product image standard rules for photography, editing, and file naming to create consistent, high-quality images for e-commerce, What Is the GS1 Product Image Standard? A Guide for Brands is a dedicated option for that workflow.
FAQ
What is the best time of day for lifestyle photography in Sterling, VA?
The best time is usually between 9:00 AM and 11:00 AM when the sun is high enough to provide plenty of light without creating harsh vertical shadows. In many Virginia homes, this morning light is soft and cool, perfectly complementing the neutral tones of Montessori-style toys.
Do I need a professional camera for lifestyle product pictures?
No, you can achieve professional results with a modern smartphone or a basic DSLR. Success depends more on your understanding of natural lighting, styling, and composition than on the price of your gear.
How do I find child models for my toy photoshoot?
The most authentic way is to ask existing customers or friends within the local community. Children familiar with your toys will interact with them more naturally, creating more believable and trustworthy marketing images.
Can I use AI to create lifestyle backgrounds for my toy photos?
Yes, AI tools can enhance backgrounds, but the toy itself must remain a real, physical photograph. Parents want to see the actual product their child will touch and play with, not a digital recreation.
How many lifestyle photos do I need for a single product?
Aim for at least 3-5 distinct lifestyle shots per product, including a wide room shot, a medium interaction shot, and a close-up detail shot. This variety gives customers a complete view of the product’s quality and value.
Crop and resize images for free