How to Take Product Photos with Phone: 6 Steps (2026 Tested)
To learn how to take product photos with phone, you need a stable tripod, a clean backdrop sweep, and soft natural light from a side window.

To learn how to take product photos with phone, you need a stable tripod, a clean backdrop sweep, and soft natural light from a side window. By locking your focus and exposure while shooting in a high-resolution format, you can produce professional-grade ecommerce images that drive conversions without the high cost of a studio.
You likely recognize the frustration that comes when a great product looks amateur through a lens. Imagine you have spent weeks perfecting a handcrafted leather wallet with supple texture, precise stitching, and a rich mahogany color. You’re ready to launch your online store, but when you snap a quick photo on your desk, the result looks dull and shadowy. The leather looks like plastic, and the harsh shadows make fine details vanish. This is the moment many small business owners realize that quality must be proven visually to build customer trust.
This exact challenge faced a jewelry designer who nearly closed her shop because her grainy photos weren’t building credibility. She didn’t need a three-thousand-dollar DSLR to fix the problem. Instead, she mastered a repeatable workflow using the device already in her pocket. Taking high-quality photos with a smartphone is about controlling the environment rather than owning the most expensive glass. This guide provides a budget-friendly strategy to ensure your listings look like they belong on a premium marketplace.
What’s the easiest at-home setup for phone product photography?
A home setup for ecommerce photography is a controlled environment designed to minimize distractions and maximize the product’s features. You don’t need a dedicated room; a simple folding table pushed against a well-lit wall is enough to create a high-converting studio space. The goal is to isolate the item so the customer focuses entirely on the craftsmanship and details.
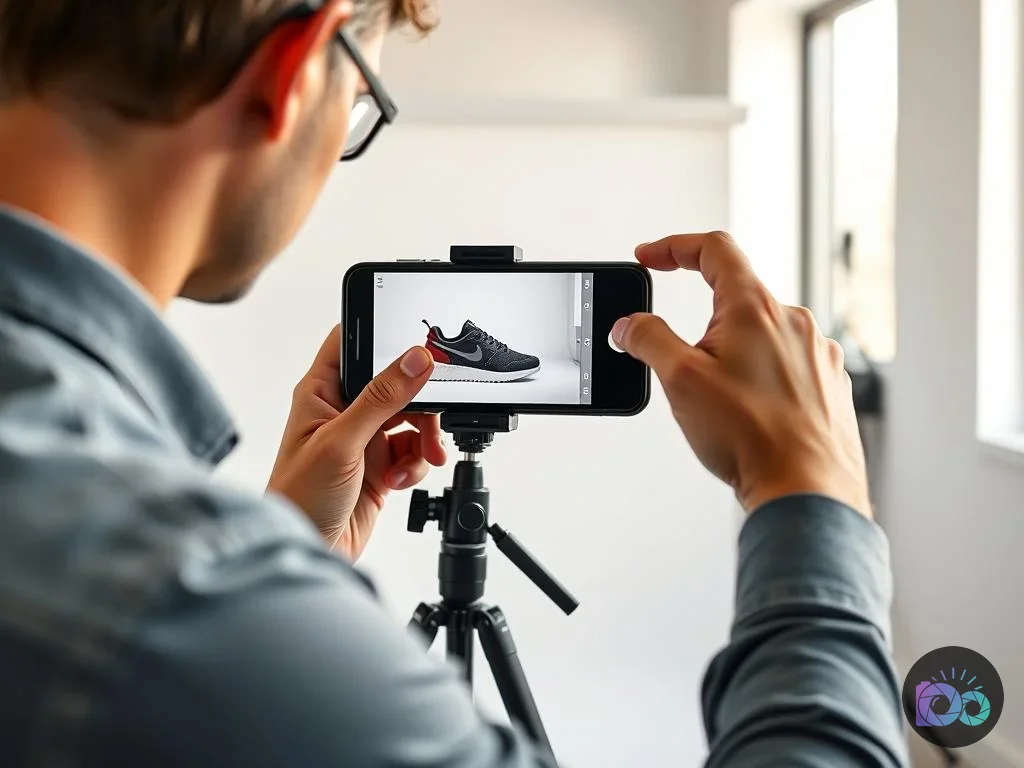
The foundation of any successful DIY shoot is the sweep. This is a flexible piece of white craft paper or poster board that drapes from the wall down onto your table. By avoiding a sharp 90-degree angle where the wall meets the table, you eliminate the horizon line. This creates the infinity curve look seen on major retail sites. To ensure your camera stays perfectly still (which is mandatory for sharpness) you should use a budget-friendly tripod. Even the slightest hand tremor can introduce ISO noise or blur, especially in indoor settings where shutter speeds might be slower. To get started, follow this foundational equipment list:
- Backdrop: A roll of white paper or a large piece of poster board to create a clean background.
- Table: Any flat surface positioned near a window for access to soft, natural light.
- Clamps or Tape: These items secure your sweep to the wall and table, preventing it from slipping mid-shoot.
- Reflector: A simple piece of white foam board to bounce light back onto the shadows for a balanced look.
- Tripod: A stable mount with a smartphone clamp to ensure consistent framing and sharpness.
For those looking to automate the process, exploring AI product photography strategies can help you understand how digital tools complement your physical setup.
What phone camera settings make product photos look professional?
Professional results on a smartphone come from overriding the auto mode. When you know how to take product photos with phone, you understand that the phone’s software often tries to over-brighten shadows, which leads to a flat, unrealistic look. To capture professional-grade images, you must take manual control of focus and exposure to preserve the natural depth of the item.
On most modern devices, including when you want to learn how to take product photos with iPhone, you can tap and hold the screen on your product to engage the AE/AF Lock. This prevents the camera from refocusing or changing brightness if you move slightly. Once locked, slide your finger up or down to adjust the exposure compensation. You want the product to be bright but not blown out where the white areas lose all detail. This manual override ensures that textures like fabric or leather remain visible and sharp. Settings Decision Table: Lighting Scenarios
| Lighting Condition | Primary Adjustment | Secondary Step | Target Outcome |
|---|---|---|---|
| Direct Window Sun | Add Diffusion (Sheet) | Lower Exposure -0.7 | Soft shadows, visible texture |
| Overcast/Cloudy Day | Increase Exposure +0.3 | Check White Balance | Bright, neutral colors |
| Warm Interior Lights | Set WB to “Tungsten” | Turn off overheads | Remove yellow color cast |
| Deep Shadows | Use White Reflector | Lock Focus on detail | Balanced light across item |
For additional technical guidance, Shopify’s product photography guidance offers excellent baseline recommendations for setting up your mobile camera for retail success.
How do you light product photos with cheap gear (and avoid harsh shadows)?
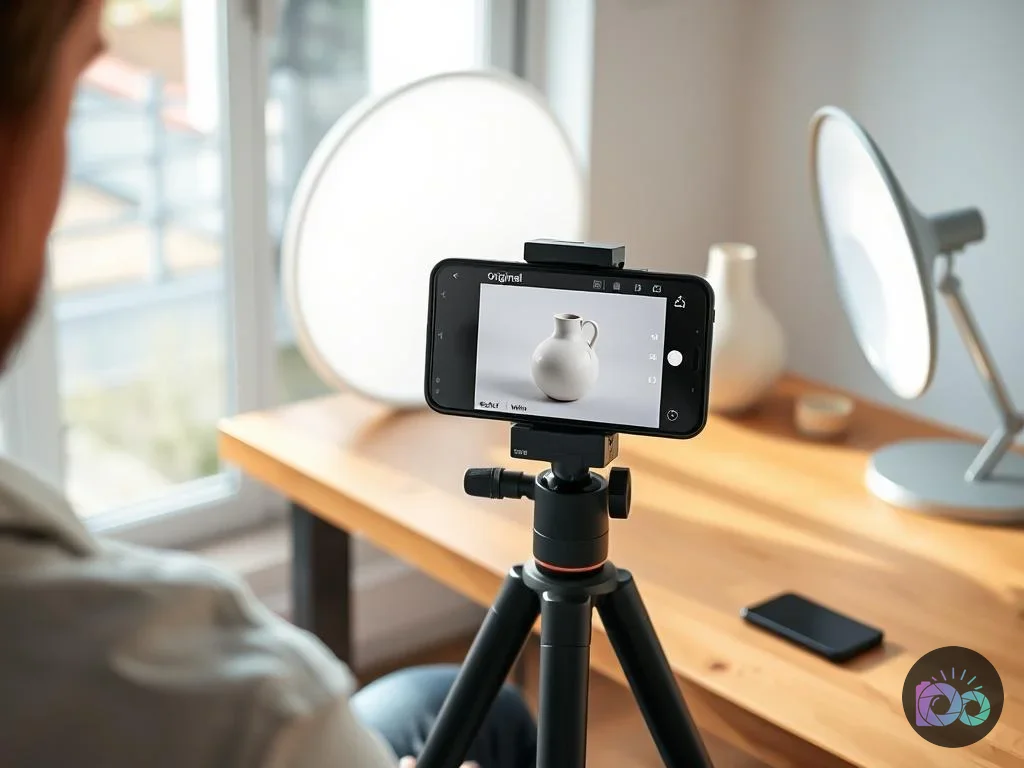
A successful product photography lighting setup relies on diffusion. Direct light, whether from the sun or a desk lamp, creates hot spots and deep shadows that hide your product’s features. The goal is to wrap the light around the object, which is achieved by placing a semi-transparent material between the light source and the product. This mimics the soft, even light found in a professional studio.
If you are using a window, a thin white curtain or a piece of parchment paper taped to the glass acts as a massive softbox. This diffused lighting is essential for maintaining color accuracy. If you are shooting at night or in a room without windows, you can use two LED desk lamps. Place one as your key light at a 45-degree angle to the front of the product, and use a white foam board on the opposite side as a reflector to fill in the shadows.
“The key to professional product shots isn’t the power of the light, but the size and softness of the light source relative to the product.” Jaron Schneider, PetaPixel
To ensure you don’t miss a single angle, use this 10-shot capture checklist for every SKU:
- The Hero: Eye-level, front-facing shot to introduce the product.
- The 45-Degree: This angle shows depth and side profile simultaneously.
- The Profile: Direct side view for thickness and shape verification.
- The Back: Important for clothing, electronics, or verifying labels.
- The Bird’s Eye: Top-down view, great for flat-lays or full kits.
- Macro Detail: A close-up of the stitching, grain, or logo to show quality.
- The Interior: Shows the inside of bags, boxes, or wallets.
- The Scale Shot: Product next to a common item like a coin or hand to show size.
- The Lifestyle: The product in its natural environment or being held by a user.
- The Packaging: A shot of the box or unboxing experience to manage expectations.
How do you edit product photos for ecommerce (background, color, sharpness)?
Editing is where you fix the small imperfections that the camera inevitably captures. Even with a perfect setup, you may see dust motes, a slightly off-white background, or colors that don’t quite match reality. The first rule of mobile editing is to avoid over-filtering. Your goal is accuracy, not artistic expression. If a customer receives a blue shirt that looked teal in your photos, they will return it, which hurts your profit margins.
Start by using a free background remover to ensure your hero shots have a perfectly consistent, pure white background across your entire catalog. This uniformity builds brand trust and makes your store look professional. When adjusting colors, focus on the Saturation and Warmth sliders. Compare the product on your screen to the physical item in your hand under neutral light. If you need to fix distracting elements, you can find insights in our guide on the best free AI image eraser tools available this year.
When adding metadata, remember that search engines cannot see your photos. You must use descriptive alt text to improve your rankings and accessibility. According to Moz’s image alt text best practices, you should describe the image specifically (e.g., “Men’s brown leather bi-fold wallet with white stitching”) rather than just using keywords.
When should you switch from a product photography setup for beginners to a pro studio?
While most products look great with a phone, there are scenarios where a mobile sensor will struggle. Using a product photography setup for beginners is highly effective for matte or textured goods, but highly reflective surfaces like polished chrome or faceted gemstones often capture the reflection of the phone itself. This creates black spots that are nearly impossible to edit out without professional tools.
You should consider upgrading to a professional setup or a macro-lens DSLR in the following cases:
- High-Gloss Items: Jewelry, glass bottles, and polished metals require specialized light tents and polarizing filters to manage reflections.
- Microscopic Details: If you sell watch movements or intricate circuit boards, a phone’s digital zoom will introduce too much ISO noise.
- Translucent Products: Items like thin fabric or liquids often need backlighting to show their true texture, which is difficult to balance with a smartphone’s dynamic range.
For most standard ecommerce goods (clothing, home decor, and accessories) a well-executed phone shoot is more than sufficient. For more inspiration on creative angles, check out these product photography ideas for lifestyle shoots.
What export settings should you use (size, format, compression) for fast pages?
Taking a beautiful photo is useless if it takes five seconds to load on a customer’s phone. Mobile shoppers are notably impatient, and large, unoptimized image files are the primary cause of high bounce rates. Once your editing is finished, you must compress your files for the web to ensure a fast browsing experience.
The industry standard for ecommerce is a square aspect ratio, typically 1000px by 1000px or 2000px by 2000px. This ensures your images look consistent in the grid view of your shop. Before uploading, use an online image compressor to reduce the file size. You should aim for a file size between 70KB and 100KB. Using a partner tool like the image compressor from RoundCut can help you maintain high visual fidelity while stripping away unnecessary metadata.
For a deeper dive into modern file types, see the RoundCut guide on WebP vs. Modern JPEG for website speed. This will help you decide if you should convert your JPEGs into more efficient formats for 2026 web standards. To maintain a professional edge, follow these export constraints:
- Format: Use WebP for the best compression or JPEG for maximum compatibility.
- Dimensions: Keep a consistent width for all product images to maintain a uniform layout.
- Color Profile: Always export in sRGB to ensure colors look the same on all screens.
- File Naming: Use descriptive names like black-leather-boots-side-view.webp instead of generic filenames.
Establishing a how to take product photos with phone workflow is about consistency and patience. By mastering your lighting, locking your settings, and optimizing your exports, you transform a simple mobile device into your most valuable marketing tool. Start today by setting up a single white sweep near your brightest window and taking your first Hero shot to build your brand’s visual identity.
If your next step is master product photography with this beginner's guide. learn 6 essential steps for lighting, backdrops, and camera settings to create compelling, 6 Essential Steps for Stunning Product Photography in 2026 is a dedicated option for that workflow.
FAQ
Can I use the portrait mode on my phone for product photos?
Portrait mode often uses software to create a fake blur that can distort the edges of your product. For professional ecommerce results, use standard photo mode to keep the entire product in focus and add any necessary blur during the editing phase.
Do I really need a white background for every product?
A pure white background is the marketplace standard because it removes distractions and ensures color accuracy. While social media shots can use textures like wood or marble to tell a story, your primary listing should prioritize a clean, neutral sweep.
Why do my phone photos look grainy even in daylight?
Grain, or ISO noise, occurs when the camera detects insufficient light and tries to artificially brighten the sensor’s output. To fix this, move closer to your light source or use a white reflector to bounce more light onto the product, allowing the phone to maintain a lower ISO setting.
Remove image backgrounds with AI


