Is Photoshop Good for Drawing? 7 Practical Insights (2026)
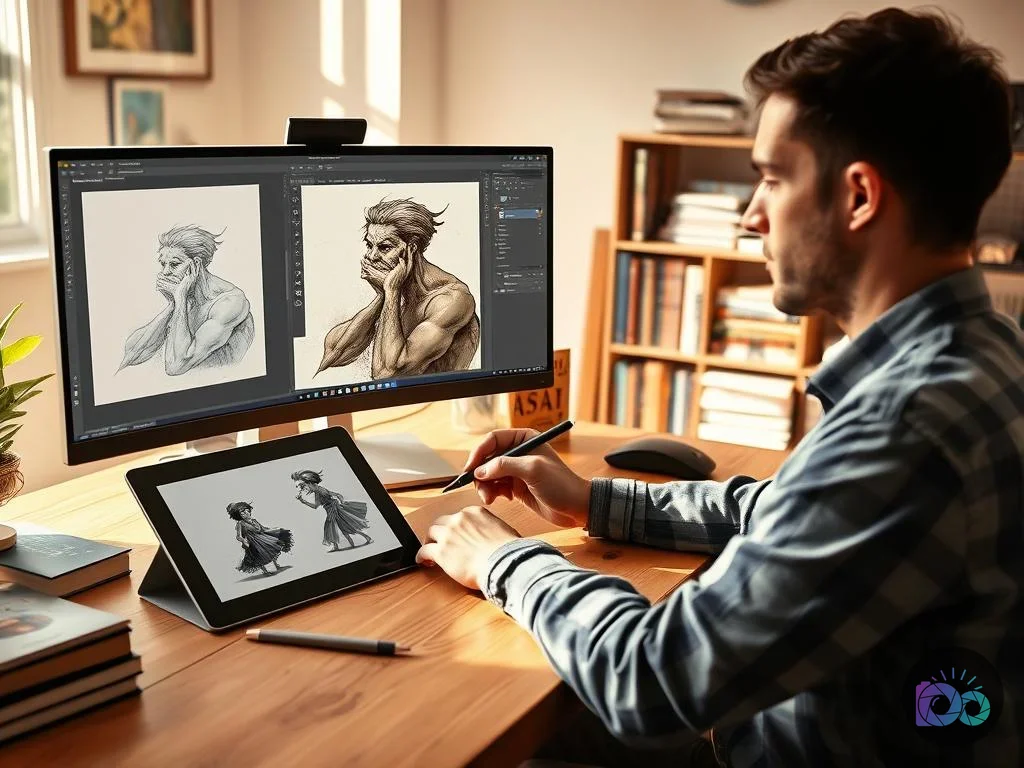
Is Photoshop good for drawing? It is—provided you use it as a high-end finisher rather than a casual sketchbook. While the software excels at digital painting…

Is Photoshop good for drawing? It is—provided you use it as a high-end finisher rather than a casual sketchbook. While the software excels at digital painting, complex textures, and layered lighting, it often feels clunky for quick ideation or clean vector work. Success on a raster canvas depends heavily on your initial setup: tablet pressure, smart document sizing, and system tuning. Plus, you need to consider whether your end goal is a social post, a web banner, or a high-resolution print for a gallery.
You likely already have access to the Adobe Creative Cloud through work or school, so the temptation to illustrate in Photoshop is strong. But then the brush lag kicks in or your lines look jittery, and you start wondering if it’s the right choice. To decide, split your workflow into two phases: the loose sketch and the final polish. Photoshop might feel stiff during that first phase, yet it becomes nearly impossible to beat once you need masks, blending modes, and AI-powered fills to wrap things up. Besides, if you’re targeting social media, keep a reference like this Instagram Story template guide handy so you don’t waste time drawing for the wrong aspect ratio.
Is Photoshop a good drawing tool for pros in 2026?
The software remains a powerhouse for raster-based art like concept illustrations and matte paintings. Still, it’s a weaker pick for logos or anyone wanting a minimalist interface that stays out of the way. Think of it as a heavy-duty studio desk rather than a portable sketchbook. Its depth is its main selling point; the brush engine and layer management allow for a level of control that lighter apps simply can’t match. Because Photoshop integrates photo elements and texture overlays so ly, it’s often the final stop for high-end work. Even though it has a learning curve, the ability to fine-tune color with Curves or use AI-assisted expansion makes it a practical hub for mixed media.
Professional usage today rarely relies on a single program. Instead, many artists use a “pipeline” approach. Imagine sketching a character on your tablet while commuting, then moving to your desktop to build complex lighting with Multiply and Screen layers. For example, if you’re working on a concept for a game environment, you might start with a rough 3D blockout, bring a render into Photoshop, and then use textured brushes to paint over the geometry while maintaining the correct perspective. Also, consider how comic colorists use layer stacks and blending modes to keep flats, shadows, and highlights editable across dozens of pages without ever losing the original line art. Since you are likely delivering to clients who need specific file types and color profiles, the software’s production toolkit aligns perfectly with a professional optimization mindset.
- Best for: Digital painting, concept art, comic coloring, and texture-heavy work.
- Avoid for: Scalable logos, crisp icons, or quick doodling on a couch.
- The catch: Raster art is pixel-dependent; enlarging your work later will cause noticeable blurriness.
Photoshop vs Procreate: Picking the right workflow
Pick Procreate if you value portability and a tactile, sketch-first feel. Choose Photoshop when you need finishing power and desktop-grade processing. Because these tools serve different bottlenecks, many illustrators use both. Procreate wins at the start—it makes canvas rotation and brush play feel effortless. Then again, Photoshop takes over when you need typography, precise masks, or a controlled export for multiple platforms. Unless you are strictly drawing for fun, you will eventually find that Photoshop’s finishing stack reduces rework, especially when your illustration needs to be reformatted into social posts, thumbnails, and website banners.
Cost is another factor. If subscription fees bother you, Photoshop might be a dealbreaker. But if you already pay for the Photography plan, in which case it’s a powerful tool you’re already funding. If your iPad is your primary device, staying in Procreate helps maintain a daily drawing habit. While Procreate is excellent for portability, Photoshop’s ability to handle massive files with hundreds of layers remains the industry standard for studio environments where collaboration and deep post-processing are required. Plus, the desktop version offers a much more robust file management system, making it easier to archive and retrieve old projects without filling up your tablet’s local storage.
| Decision criterion | Pick Procreate | Pick Photoshop |
|---|---|---|
| Environment | Mobile, travel, casual settings | Desktop, studio, multi-monitor |
| Priority | Speed and sketching flow | Control and post-processing |
| Deliverables | Screen-ready illustrations | Complex, multi-layered assets |
| Budget | One-time purchase | Subscription-based |

Professional settings for a better drawing experience
A frustrating drawing experience usually stems from bad settings, not a lack of talent. Fix the friction by simplifying what the software has to process per stroke. Start in Preferences > Performance; ensure GPU acceleration is active and allocate enough RAM without starving your system’s other essential background processes. Also, check your tablet drivers. If pen pressure isn’t varying your line weight, the fanciest brush pack in the world won’t help you. Plus, you should verify that your operating system isn’t running in a power-saving mode, as this often throttles the CPU and GPU exactly when you need them for smooth, responsive brush strokes.
Next, look at your brushes. High-resolution textures or complex dynamics can cause stuttering. Besides, you should decide between ‘Smoothing’ and ‘Catch-up’ modes based on the task. For loose sketching, lower the smoothing to keep the pen responsive. While inking, you might accept a tiny bit of lag for perfectly stabilized curves. Imagine you are drawing a long, sweeping curve for a character’s cape; in this scenario, turning on ‘Catch-up’ stroke behavior ensures the line follows your hand with a steady delay that irons out any natural hand tremors. Then again, if you are doing quick gesture studies, you want that setting off so the brush tip tracks your movements instantly. Even though it feels like a hardware issue, brush lag is often just a symptom of a heavy brush engine trying to render too much detail at once.
- Performance check: Enable GPU acceleration and set a sane Memory Usage level to prevent stutter during long, fast strokes.
- Brush tuning: Compare low smoothing (0-10%) for sketches vs. high values (30%+) for final linework.
- Driver sanity: Confirm pressure sensitivity and tilt support are actually firing in Photoshop’s Brush Settings panel.
How to fix brush lag and stuttering
Brush lag is usually a performance bottleneck, not a drawing skill issue. Fix it by reducing the work the app must do per stroke: tune GPU settings, simplify brush dynamics, and control your canvas size. Start with the simplest diagnosis: check whether lag happens with a basic round brush. If it doesn’t, your problem brush is too heavy—often due to large texture, dual-brush behavior, or high spacing complexity. Also, check your canvas plan: huge documents with dozens of layers and large smart objects can stutter during long strokes, especially if you’re also running screen recording, browser tabs, and cloud sync in the background.
Then go deeper: Preferences > Performance is the control center, and GPU acceleration can be the difference between usable and frustrating. If GPU is on and lag persists, you may be hitting scratch disk limits or memory pressure; freeing disk space and closing heavy apps can improve stroke response immediately. Plus, you should test Smoothing and Catch-up stroke behavior separately from performance fixes so you don’t confuse intentional stabilization with accidental lag. Since Photoshop is a resource-intensive application, keeping your workspace lean by merging old sketch layers and archiving hidden groups will provide a noticeable boost in responsiveness during the inking phase.
| Symptom | Likely cause | Fast fix |
|---|---|---|
| Lag on specific brushes | Heavy texture/dynamics | Use a simpler brush; reserve texture for finishing |
| Lag increases over time | Memory/scratch pressure | Close apps, free disk space, merge layers |
| Lines feel behind hand | Smoothing settings | Lower Smoothing or disable Catch-up |
The pro-level finisher: Why Photoshop wins at the end
Photoshop excels at the “finishing pass.” Adjustment layers let you shift colors without touching your original paint. Layer masks allow for non-destructive edits, so you never have to worry about accidentally erasing pixels you need later. Also, AI Generative Fill is a for composition. Imagine you’ve finished a vertical portrait but now need a horizontal version for a web banner. The AI can extend the background, giving you a base to paint over and match your style. Yet, you should treat these AI tools as a productivity shortcut rather than a replacement for your own artistic vision, as they work best when you refine the results with manual painting on a separate layer.
However, you must respect the raster limit. If a client asks for a logo that works on a business card and a billboard, do not use Photoshop. For that, you need vectors. Because pixels don’t scale like SVG files, your work will lose quality if stretched. Check MDN’s SVG guide for more on this. For web-bound art, use tools like RoundCut’s compressor after exporting to ensure your high-quality layers don’t slow down your site. Plus, you can use a circle crop tool for quick avatar exports without messing with your master PSD. Since you’re likely sharing your work on social platforms, comparing your final framing against your target dimensions before you commit to details will save you from awkward crops later.
- The Workflow: Sketch elsewhere → Import to Photoshop → Ink and Color → Lighting via Blending Modes → Final Grading → Export.
- Related reading: For a deeper look at AI integration, check out this comparison of Photoshop AI vs other tools to ensure you’re using the best tech for your needs.
Photoshop is a professional-grade finisher, not just a drawing program. It works best when you set up your environment for performance and use its deep layer system for the final polish. Unless you need the infinite scalability of vectors, its combination of traditional digital painting and AI-assisted tools makes it hard to replace. Still, the best way to decide is to run one focused 30-minute session with a real deliverable. If the control you gain over the final image outweighs the subscription cost, it’s the right tool for your studio. Even though other apps might feel faster for sketches, the power of the Adobe ecosystem ensures your work is ready for any professional platform.
If your next step is learn how to choose the right free background removal tool for your needs. this guide covers ai accuracy, speed, and options for e-commerce pros, 5 Tips to Choose the Best Free Background Remover in 2026 is a dedicated option for that workflow.
FAQ
Is Photoshop a good drawing program for beginners?
It can be, though the sheer number of features is often overwhelming. If you’re starting out, hide everything except the Brushes, Layers, and Color panels until you’re comfortable with the basics.
What’s the best drawing tablet for Photoshop?
Focus on driver stability over price. Any tablet from a reputable brand (like Wacom or Huion) that supports consistent pen pressure and tilt in your operating system will work perfectly.
How do I stop my lines from looking ‘mushy’ in Photoshop?
Stick to a simple hard round brush for linework. Avoid brushes with heavy textures or complex dynamics, as these often cause lag and create soft, undefined edges.
Can I design logos in Photoshop?
You can sketch ideas, but final logos should be vector-based. Use Photoshop for the initial concept or mockups, then move to a vector tool for the finished, scalable asset.
Does Photoshop’s AI actually help with drawing?
It’s best for background expansion and reframing. Use Generative Fill to extend a canvas, then paint over the AI output on a new layer to maintain your personal artistic style.
Crop and resize images for free


