Batch Compress Images Guide 2026: Folder to ZIP
Batch compress images without confusing ZIP with real image savings. Resize oversized originals, compress the set, and download one clean folder.

Contents
Batch compress images by fixing the image files first, then using ZIP only as the delivery package. If the photos are huge, resize the longest edge before compression. If the dimensions are already right, compress the JPG, PNG, WebP, or AVIF files together and download the finished set as one ZIP.
Native batch resizing first
Start with the built-in tool when the problem is obvious: oversized originals. Apple says Preview can resize multiple images at once by opening them in the same window, selecting them in the sidebar, and choosing Tools > Adjust Size. That is the cleanest Mac path when every photo needs the same pixel cut.
The drawback is workflow, not quality. Preview is good at a quick batch resize, but it does not behave like a batch web compressor with a before/after size list, mixed web formats, and one download package built around the finished set. I use it when a folder of 4032 px phone photos only needs to become 1600 px wide. I don’t use it when the brief says, “send me the compressed folder.”
ZIP versus image compression
A ZIP is a container. It makes one download out of many files, but it usually won’t shrink JPGs much because JPGs are already compressed. The practical move is to compress or resize the images first, then ZIP the results for handoff.
I ran a small local check to make the point concrete. Six synthetic JPG test files totaled about 3.96 MB. A normal ZIP came out at 3,960 KB, almost identical to a store-only ZIP at 3,959 KB. But resizing one 2400 x 1600 JPG from 663 KB to 1600 x 1067 at quality 82 made it 215 KB. That is the lever (small, but it changes the whole folder).
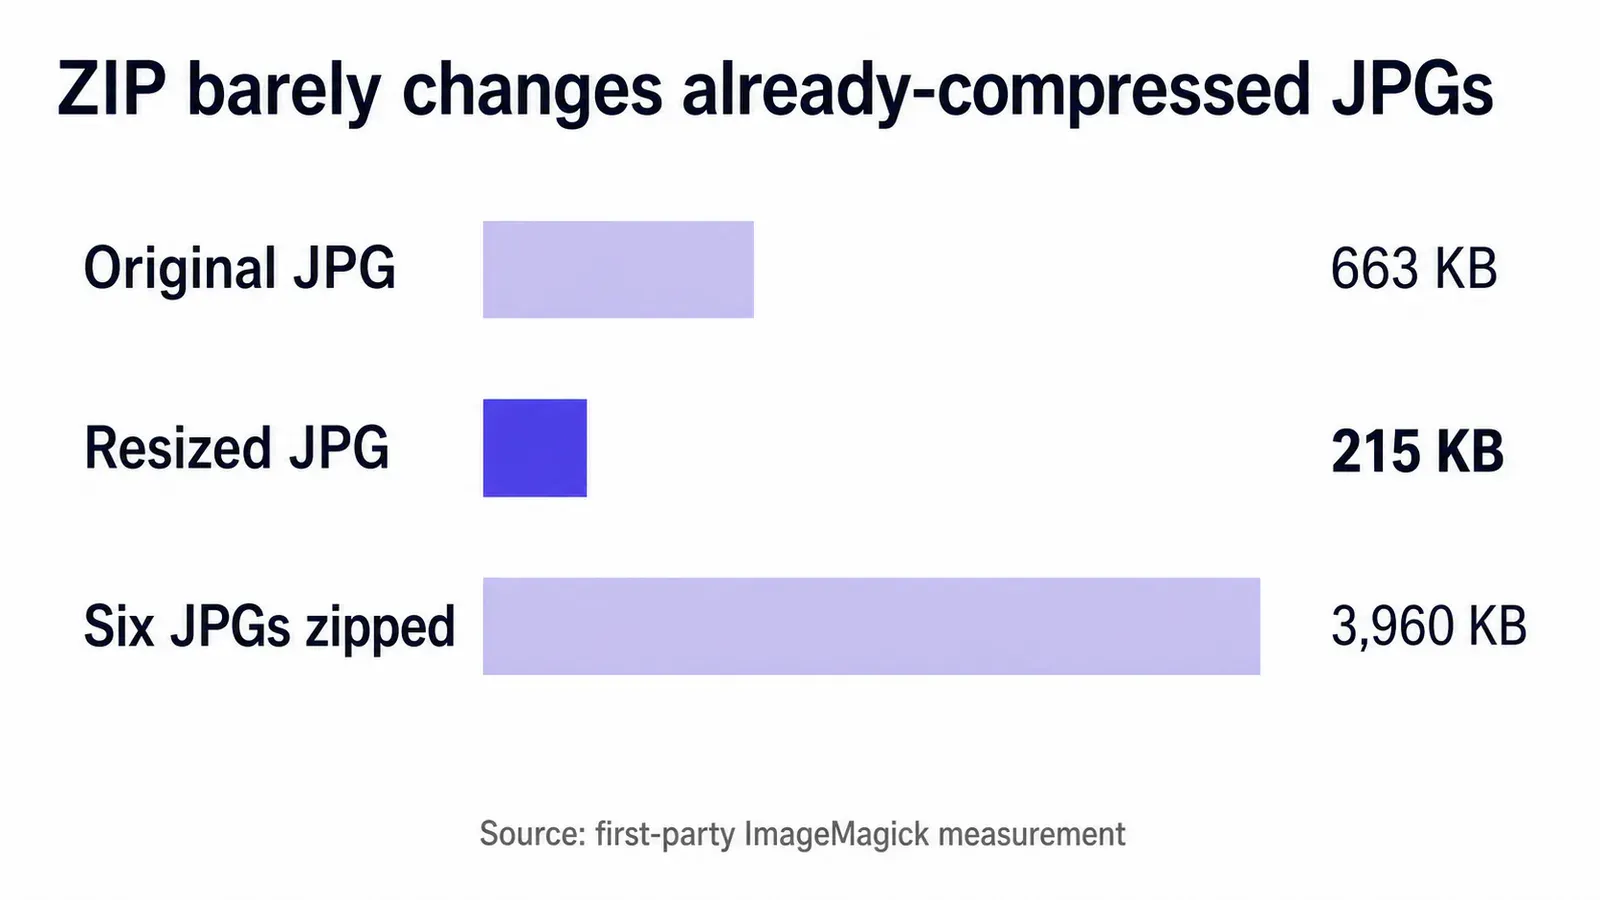
This is why the “just zip the folder” advice trips up image work. ZIP helps your recipient avoid six separate downloads. It does not solve upload limits, website payload, or a marketplace form that rejects heavy photos. If you need a hard target, this guide gets into pixels and encoder quality before the archive.
Batch compression in Araluma
Use Araluma Compress when the folder already has the right dimensions and you want the files lighter without converting every format by hand. It keeps each file’s format through the job: JPG stays JPG, PNG stays PNG, WebP stays WebP, and AVIF stays AVIF.
The workflow is short:
- Open Compress.
- Drop the whole set onto the grid.
- Press Compress once.
- Review the before/after size for each file.
- Download the ZIP.
The useful limit is clear: up to thirty pictures go in one run. That’s enough for a product batch, a blog post image folder, or a small client handoff. It is not a digital-asset-management system. If you’re pushing hundreds of catalog shots, split the folder by section so review stays sane and one bad file does not make the whole pass harder to inspect.
Folder prep before upload
Before you add the folder, make the folder boring. Delete rejects, rename finals, and separate source files from exports. A mixed folder with IMG_4021, final-final, screenshots, and a logo PNG will technically compress, but it makes review slower because every file is solving a different problem.
For a web folder, sort by destination (not by where the files came from):
- Product photos
- Blog screenshots
- Logo and UI assets
- Social previews
Then compress each group separately. HTTP Archive’s 2025 Web Almanac gives the reason this still matters: the median desktop page used 1,059 KB of image bytes, and the median mobile page used 911 KB. At the 90th percentile, image bytes ran past 6 MB on both desktop and mobile pages. One hero shot won’t ruin a site; a folder of untrimmed exports will.
MDN’s file input docs also explain a small browser quirk behind many upload screens: a file input can allow more than one file, and those files can then be handled with JavaScript and the File API. A literal folder picker is a separate behavior. If a web tool asks for files instead of a folder, select the images inside the folder and keep moving.
When resizing beats compression
Resize first when the pixel dimensions are wildly larger than the destination. A 4000 px photo used at 1200 px wide carries pixels the layout can’t show. Compression can squeeze those pixels; Araluma Resize removes them.
My rule is blunt: if the longest edge is more than double the displayed size, resize before compression. If the dimensions are already close, leave the grid alone and compress. Too much resizing softens fine texture, especially product fabric, jewelry edges, and UI screenshots with small type.
That trade-off changes by format. For screenshots and interface images, you may get a better result by moving heavy PNGs through an AVIF workflow or using this PNG guide when alpha matters. For photos headed to an app that only wants JPG, Araluma Convert handles the odd formats before you compress the final set.
Quality checks before replacing originals
Never overwrite the originals on the first pass. Keep a source folder, export into compressed, and only replace files after checking the result at the size people will actually see. Full zoom is useful for catching broken text and ugly halos; it is a bad judge of a 900 px product card.
Check three things:
- Edges: hair, glass, product outlines, and small type.
- Gradients: skies, studio backdrops, and soft shadows.
- File order: the ZIP should preserve the set you meant to send.
For email, the target is different. A folder of photos does not need web-performance tuning; it needs to fit the message or avoid forcing a cloud link. Use the email workflow for that. For a tooling comparison, the bulk resizer test is the better next read.
If the ZIP is still too heavy after compression, don’t run the same pass again and hope. Resize the biggest offenders, compress once more, and keep both folders until the recipient confirms the upload worked.


