Resize Image by Percentage: A Clean Pixel-Math Guide
Resize an image by percentage without guessing: use the pixel formula, pick a safe percent, and avoid blur on photos or screenshots.

Contents
To resize an image by percentage, multiply the original width and height by the same percent. A 4032 x 3024 photo at 50% becomes 2016 x 1512. Use percentage when you want the same framing at a smaller scale; use exact pixels when a platform asks for a fixed size.
Native resize tools first
Preview and Paint handle quick percentage resizing well enough for one file. They are the right first stop when the photo is already on your computer, the target is simple, and you don’t need to compare several output sizes before exporting.
On a Mac, Preview is the cleaner native route. Apple documents a percentage option inside Tools > Adjust Size, plus a “Scale proportionally” setting that keeps width and height moving together. It also supports resizing several selected images in one Preview window, which is good for a small folder.
Windows is rougher. A Microsoft Q&A answer points people to Paint’s resize tool to reduce pixel count, but it also gives the warning I agree with: work on a copy, not the only original. Paint is fine for a fast 50% version. It is not where I’d tune a product image, a hero shot, or anything that needs a precise export pass.
Araluma when percent needs a preview
When you need to resize image by percentage and still see the resulting dimensions, use resize image by percentage in Araluma. The better workflow is to try a percent, check the new pixel size, then switch to exact pixels if the destination has a hard requirement.
That sounds fussy. It saves rework. A percentage is relative to the source file, so 50% means different things on a 4032 x 3024 phone photo, a 1920 x 1080 screenshot, and a 1200 x 628 ad graphic. The visual hierarchy stays the same, but the final pixels do not.
If the resized file is still too heavy, resize first and use Araluma Compress second. Compression before resizing wastes time because the editor still has to throw away pixels afterward.
The percentage formula
The math is boring in the useful way: new width equals original width times percent divided by 100, and new height uses the same formula. Keep the same percent on both sides unless you’re deliberately stretching the image (a fast way to make faces and logos look wrong).
Here’s the sample I generated for this post: a 4032 x 3024 JPEG resized to 75%, 50%, and 25%. The bytes are not a universal benchmark because the source is flat color, but the pixel math is the part you can trust.
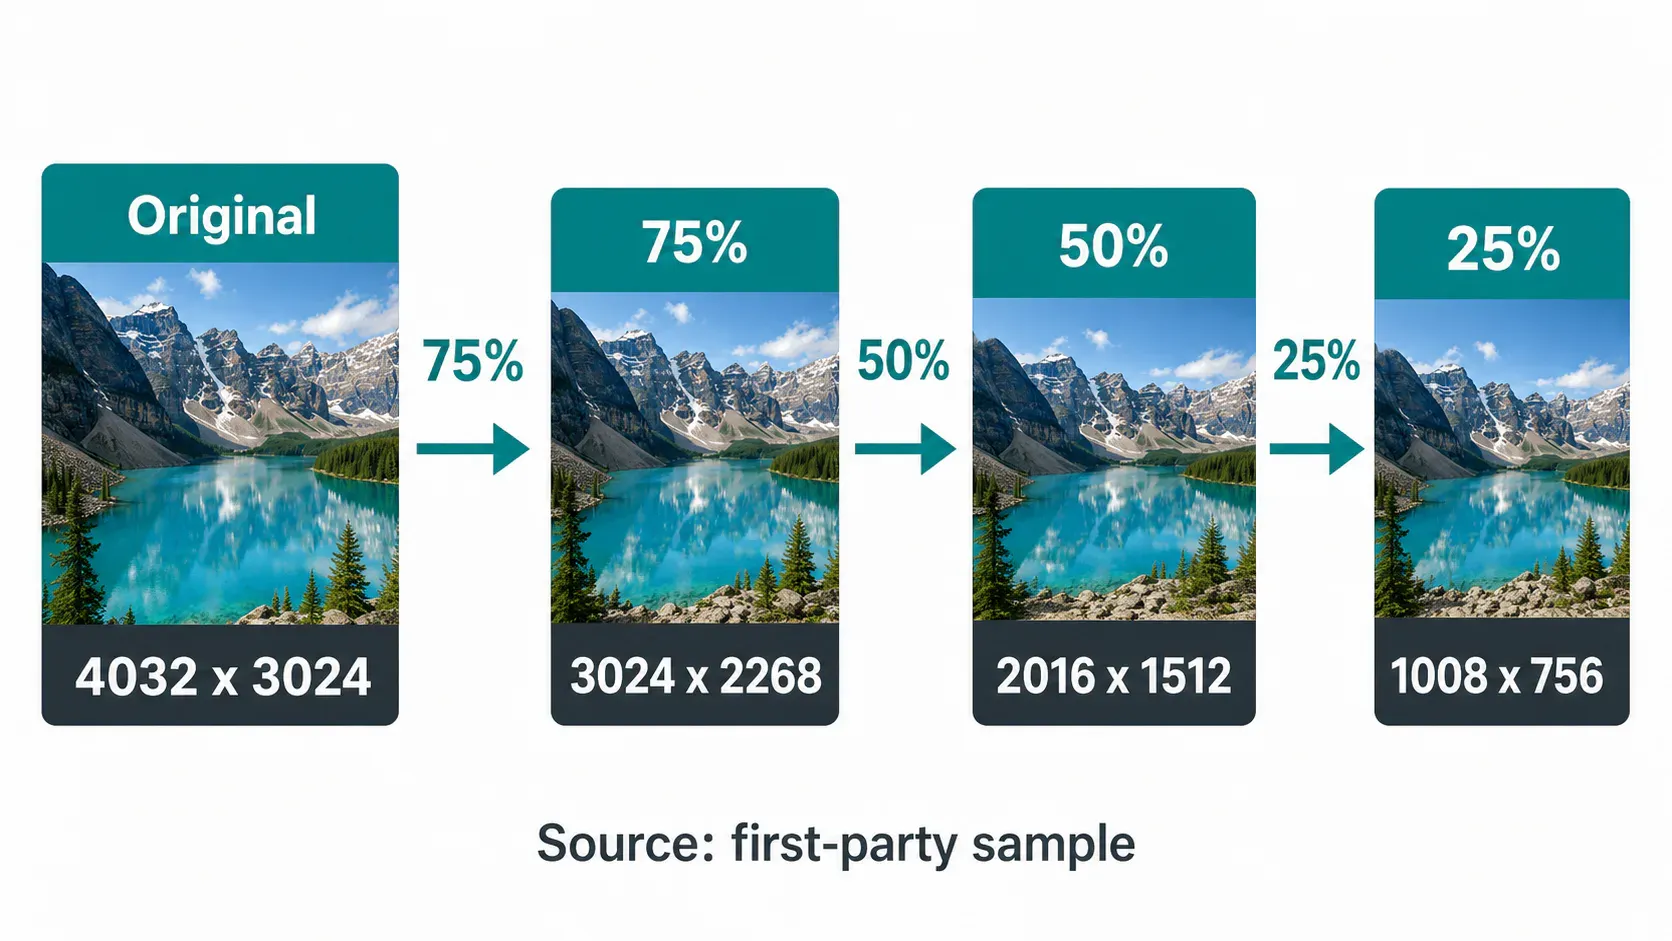
| Resize percent | Width calculation | Height calculation | Result |
|---|---|---|---|
| 75% | 4032 x 0.75 | 3024 x 0.75 | 3024 x 2268 |
| 50% | 4032 x 0.50 | 3024 x 0.50 | 2016 x 1512 |
| 25% | 4032 x 0.25 | 3024 x 0.25 | 1008 x 756 |
My default for web work is 50% on large phone photos, then exact pixels after that if the page has a known display slot. If you’re working on website images, the more reliable rule is still to follow a web-speed workflow instead of keeping a huge file and hoping the browser makes it cheap.
Percentage choices that usually work
Use 75% when the image is only a little too large and you care about keeping detail. This is the conservative move for product photos, portfolio images, and anything with small texture.
Use 50% when the original came from a modern phone and the destination is a web page, email draft, or quick approval comp. A 4032 x 3024 photo landing at 2016 x 1512 still has enough pixels for normal screens, and it cuts the canvas area to one quarter of the original.
Use 25% only when the image is wildly oversized for the job. It can be right for a quick thumbnail, a draft deck, or a reference image inside a Slack thread. It is usually wrong for marketplaces, where crop safety and zoom matter more than a tiny file. For that situation, I would follow the marketplace version instead of guessing a percent.
The trap is file-size tunnel vision. If the brief says “under 200 KB,” do not keep dragging quality down on a giant photo. Resize first, then tune the export, the same way I handle a target-size guide.
Blur, smoothing, and screenshots
Downsizing a photo usually hides small softness because neighboring pixels are being combined into fewer pixels. Upsizing is different. A 1200 px image enlarged to 200% does not gain new real detail; it gets interpolation, which can make edges look waxy.
Browser tools commonly smooth scaled images. MDN’s smoothing note says canvas image smoothing is enabled by default and that enlarged pixels can blur when the default resizing algorithm runs. That is good for photos. It can be bad for pixel art, UI icons, and screenshots with tiny type.
So split the work by subject. Photos can take smooth resizing. Screenshots need a sharper eye on text, gutters, and one-pixel borders. If a screenshot looks soft after a percentage resize, go back to the original, crop the important area, and export at exact pixels instead of scaling the whole screen down.
For print, do not use percentage as the first decision. Start with the required print size and pixel count, then decide whether the file needs resizing or upscaling. The print walkthrough is a different problem from making a web copy lighter.
Batch resizing without wrecking originals
Batch resizing is where percentage is useful and dangerous. It is useful because a whole folder from one camera usually shares the same dimensions, so 50% gives predictable results across the set. It is dangerous because mixed folders do not behave that way.
Before a batch run, sort the folder by dimensions (the boring check that prevents bad exports). Keep the 4032 x 3024 phone photos together, the 1920 x 1080 screenshots together, and the odd exports somewhere else. Then run one percent per group. If you batch everything blindly, a tiny logo and a full-size product photo get punished by the same math.
I also keep originals in a separate folder before resizing. That is not nostalgia; it’s version control for images. Once you resize and save over a JPEG, the lost pixels do not come back, and saving again can add another compression pass.
For larger sets, borrow the same discipline from this folder workflow: make a copy, run the resize, inspect a few edge cases, and only then compress or package the final folder.
The simple rule: use Araluma Resize for the percentage pass, switch to exact pixels when a platform gives you a spec, and never let the resized copy become your only copy.


