How to Rotate an Image Before Uploading
Fix a sideways image before upload: use Photos, Windows Photos, Google Photos, or a browser crop tool, then check the preview.

Contents
To rotate an image before uploading, fix the orientation first, then crop or resize only if the destination preview still looks wrong. Use the built-in Photos app on iPhone, Windows Photos on PC, or Google Photos on Android for one file. Use a browser crop tool when you need rotation and framing in the same pass.
The orientation fix to pick
Everyone’s been here: the photo looks upright in your phone gallery, then lands sideways in a form, listing editor, or CMS preview. The fix depends on the failure. Rotate handles a photo that is turned 90 degrees. Straighten handles a tilted table, horizon, or product edge. Flip handles a mirrored selfie, logo, or product shot.
Use the native editor first. It is already on the device, and it usually saves a corrected copy without changing file format or compression settings. The drawback is that native tools solve orientation, not the whole upload job. If the same file also needs a tighter frame, use Araluma Crop Image after the native check, then export one upload-ready copy.
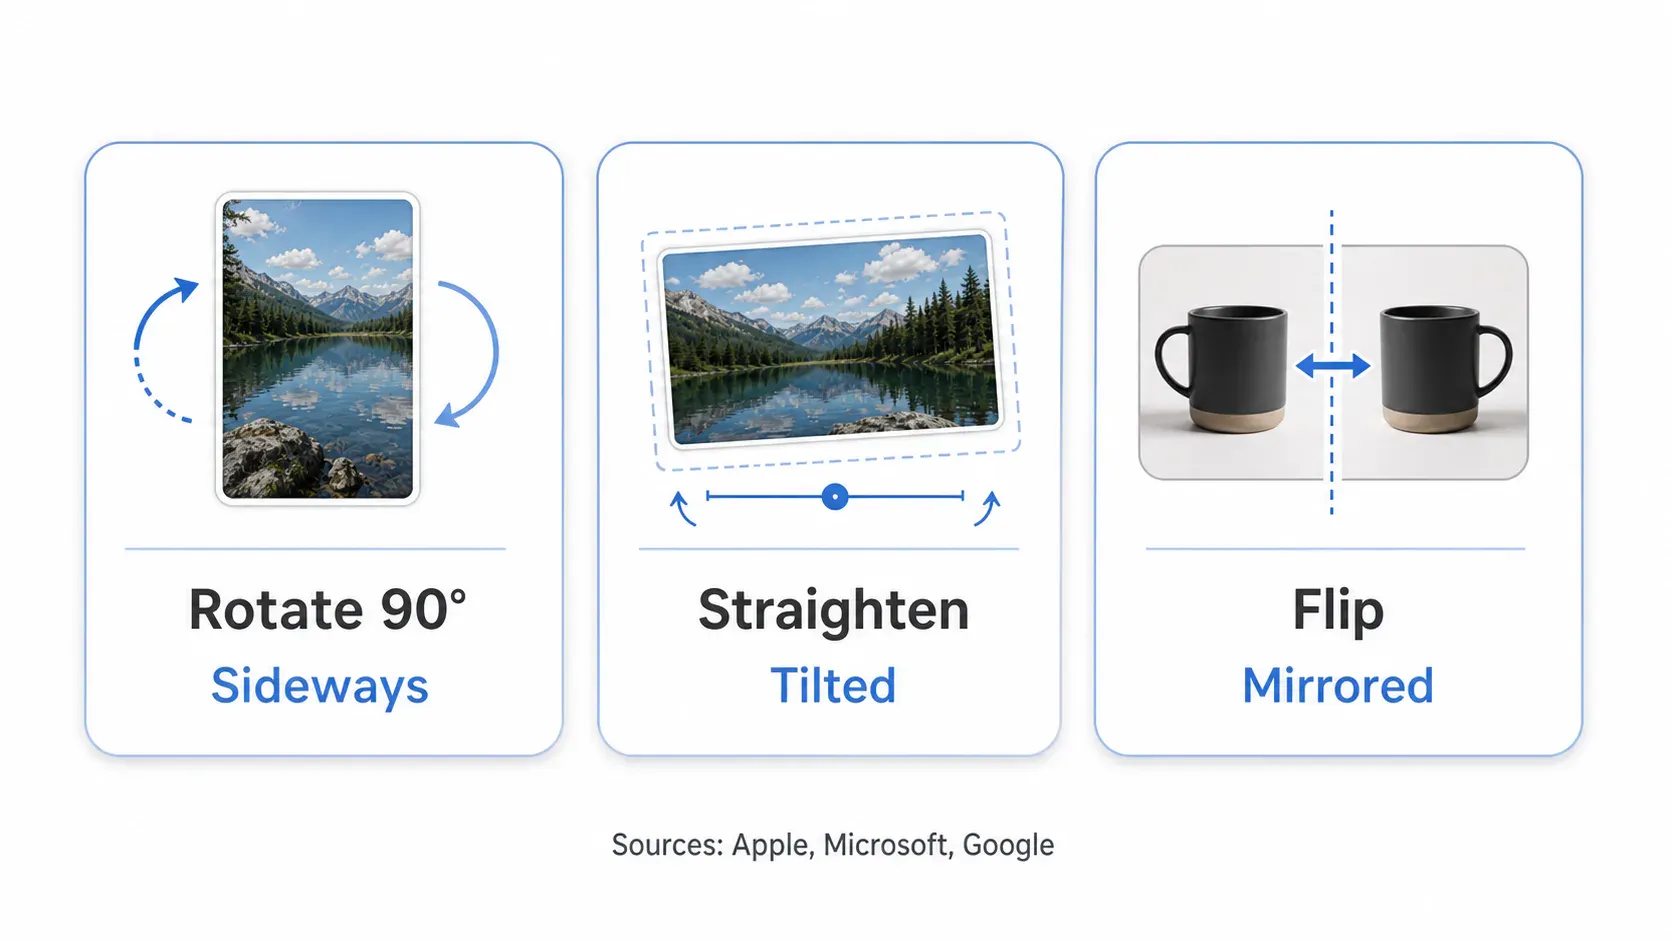
Here’s the rule I use before a client upload: if the subject is sideways, rotate; if the subject is upright but slanted, straighten; if left and right are reversed, flip. Crop only after the orientation is settled, because crop handles lie when the frame is turned.
iPhone Photos first
On iPhone, open the photo, tap Edit, enter the crop tools, and use Rotate until the image sits upright. In the Apple iPhone User Guide, Apple documents the rotate control as a 90-degree turn, and the same panel includes straightening and vertical or horizontal tilt controls.
The practical move is simple:
- Open the image in Photos.
- Tap Edit.
- Tap Crop.
- Tap Rotate once for a sideways photo, twice for upside down.
- Use Straighten only if the horizon or table line is off.
- Tap Done.
That’s enough for most iPhone-to-upload problems. It won’t fix a bad destination crop, though. If a marketplace, profile slot, or blog editor cuts into the subject after rotation, handle the shape next, the way you’d handle a 16:9 thumbnail crop after the picture is facing the right way.
Windows Photos for one file
Windows Photos is the fastest native fix when one downloaded image or phone import opens sideways. Microsoft Support says Photos can crop, flip, rotate left or right by 90 degrees, rotate by incremental degrees, and flip by 180 degrees.
For a clean upload copy:
- Open the file in Photos.
- Choose Edit image or press
Ctrl + E. - Use Rotate left or right for a 90-degree correction.
- Use the straighten slider only for a small tilt.
- Save a copy if you want to preserve the original.
This is where people over-edit. A sideways form rejection doesn’t need a filter, a color pass, or a new format. It needs the pixels written in the orientation the upload preview expects (a dull fix, but the right one). If the platform rejects the format after that, treat it as a separate upload-form format fix instead of muddying the rotation step.
Android and Google Photos
In Google Photos on Android, open the image, tap Edit, then Crop. Google Photos Help lists Straighten, Rotate, Perspective, Aspect ratio, and Mirror inside that crop toolset, with Rotate turning the photo 90 degrees and Save as copy preserving the original.
I like Save as copy here. It gives you one file for the upload and leaves the camera original alone, which matters when the phone gallery is also your source archive. If the corrected copy still looks too wide, crop it after the rotation. If it looks right but the site complains about pixels, then use Araluma Resize instead of touching the angle again.
Small distinction, big effect. Rotate changes direction. Resize changes dimensions. Compression changes bytes. Mixing those three jobs is how a crisp photo turns into a soft, sideways, still-too-large upload.
Browser rotation plus crop
Use a browser crop tool when the built-in editor fixes orientation but leaves you with the wrong frame. A product photo might need one 90-degree turn, a tighter square crop, and a cleaner export for a listing thumbnail. A banner might need the same rotation, then a wide crop that preserves the subject’s visual weight.
Araluma’s crop page is the right internal tool for that job because it combines framing with transform controls. The trade-off is honest: for a single phone photo, iPhone Photos or Windows Photos is faster. Use the browser path when you are already preparing the final upload copy and need the orientation, crop, and export decision in one screen.
The order matters:
- Rotate until the subject faces the correct direction.
- Straighten only if the subject is tilted.
- Lock the destination ratio if the slot is fixed.
- Crop around the important subject, not the empty frame.
- Export one corrected file.
If that corrected file is still too heavy for the upload form, compress image after the crop. The same geometry-first sequence applies in this 200 KB guide: fix pixels before you punish quality.
Batch rotation on Mac
macOS Preview is the native exception for batches. Apple documents a workflow where multiple images shown in the same Preview window can be selected from the thumbnail sidebar, then rotated or flipped together from the Tools menu. That’s cleaner than opening 24 phone imports one by one.
Batch rotation is worth it when all files share the same mistake, like a folder of receipt scans turned left. It is risky when the folder mixes landscape, portrait, and screenshots. Rotate a mixed batch blindly and you’ll fix 12 files while breaking 12 others (usually the screenshots).
Do a contact-sheet pass first. Select only the files that share the same direction, rotate that group, then open one result before uploading the set. For product photos, I still check the first and last file after batch rotation because a single wrong orientation in a marketplace gallery looks careless at thumbnail size.
Final upload check
Before you upload, open the corrected file and ask four boring questions:
- Does the subject face the right direction?
- Is the horizon or product edge straight enough?
- Did the crop cut into the useful part of the image?
- Did the destination preview keep the same orientation?
The preview is the real test. Some systems generate their own thumbnails, and a file that looks correct locally can still render oddly after upload. If the preview is wrong, make a new corrected copy and upload again rather than layering another edit on top of the rejected file.
For exact pixel work, keep the rotation file separate and use this guide after orientation is solved. A clean workflow leaves you with three possible files: original, rotated copy, and final upload copy. The original stays untouched. The upload copy does the job.


