PowerPoint File Size Guide: Picture Settings That Shrink a Deck
A heavy PowerPoint deck is the pictures. Measured: the 150 ppi resize returns 52 percent, switching those exports to JPEG returns 92 percent. Do both.

Contents
A heavy deck is almost always the pictures, and PowerPoint ships them close to untouched. The fix has two halves: run Compress Pictures with Delete cropped areas checked, then get the images out of PNG. On a 29.91 MB test set here, the resolution change returned 52.4 percent of the weight and the format change returned 91.7 percent.
Compress Pictures, PowerPoint’s own fix
The deck behaves on your machine, then stalls on a client’s laptop or bounces off an attachment cap. Start with the control Microsoft built for exactly this. Click any picture on any slide, open the Picture Format tab, and choose Compress Pictures.
Four settings in that dialog decide what you get back:
- Clear “Apply only to this picture”, or you have fixed one image out of forty.
- Check “Delete cropped areas of pictures”. Microsoft’s own steps warn that the cropped data will not come back afterwards, which is the whole point of checking it.
- Check “Discard editing data”, the stored history used to roll an edited image back to its original state.
- Pick the resolution. The same page says to select “a resolution that is 150ppi or lower” for a smaller file.
One catch before you celebrate. File > Options > Advanced holds a checkbox called “Do not compress images in file”, and while it’s on, that dialog is decoration. The second catch is the browser: those controls “aren’t available in Microsoft 365 for the web, but only the desktop versions of the Office apps”, so a deck built in a tab has to arrive with light pictures already. That’s the case where I compress images before they ever touch a slide.
Why the deck was heavy to begin with
PowerPoint stores what you hand it, at close to full weight. Microsoft documents that in PowerPoint 2016 and newer the default image resolution is already “high fidelity”, which leaves pictures uncompressed unless they exceed the document canvas (which a slide photo pasted at export size rarely does). A 6 MB PNG that fits inside the canvas travels intact, forty slides deep.
A .pptx is a ZIP package, which is why the old “just zip the file before sending” advice keeps circulating. I ran it. Twelve PNG exports totalling 29.91 MB, deflated into a ZIP, came out at 29.89 MB: 0.09 percent saved, in 0.94 seconds. The packaging has nothing left to squeeze, because PNG already carries deflate compression inside the file. Anyone who has watched a folder of photos refuse to shrink in a ZIP has met the same wall, which is the reason a batch compress a folder workflow measures the images, not the archive.
The 150 ppi rectangle is 2000 x 1125 pixels
That “150ppi or lower” instruction means nothing until you multiply it by the slide. A widescreen slide is 13.333 by 7.5 inches, and 16:9 is the default for new presentations. So: 13.333 x 150 = 2000 pixels wide, and 7.5 x 150 = 1125 pixels tall. That rectangle is what Compress Pictures aims at. At 220 ppi, which Microsoft lists as the default picture resolution in Microsoft 365, the target grows to 2933 x 1650.
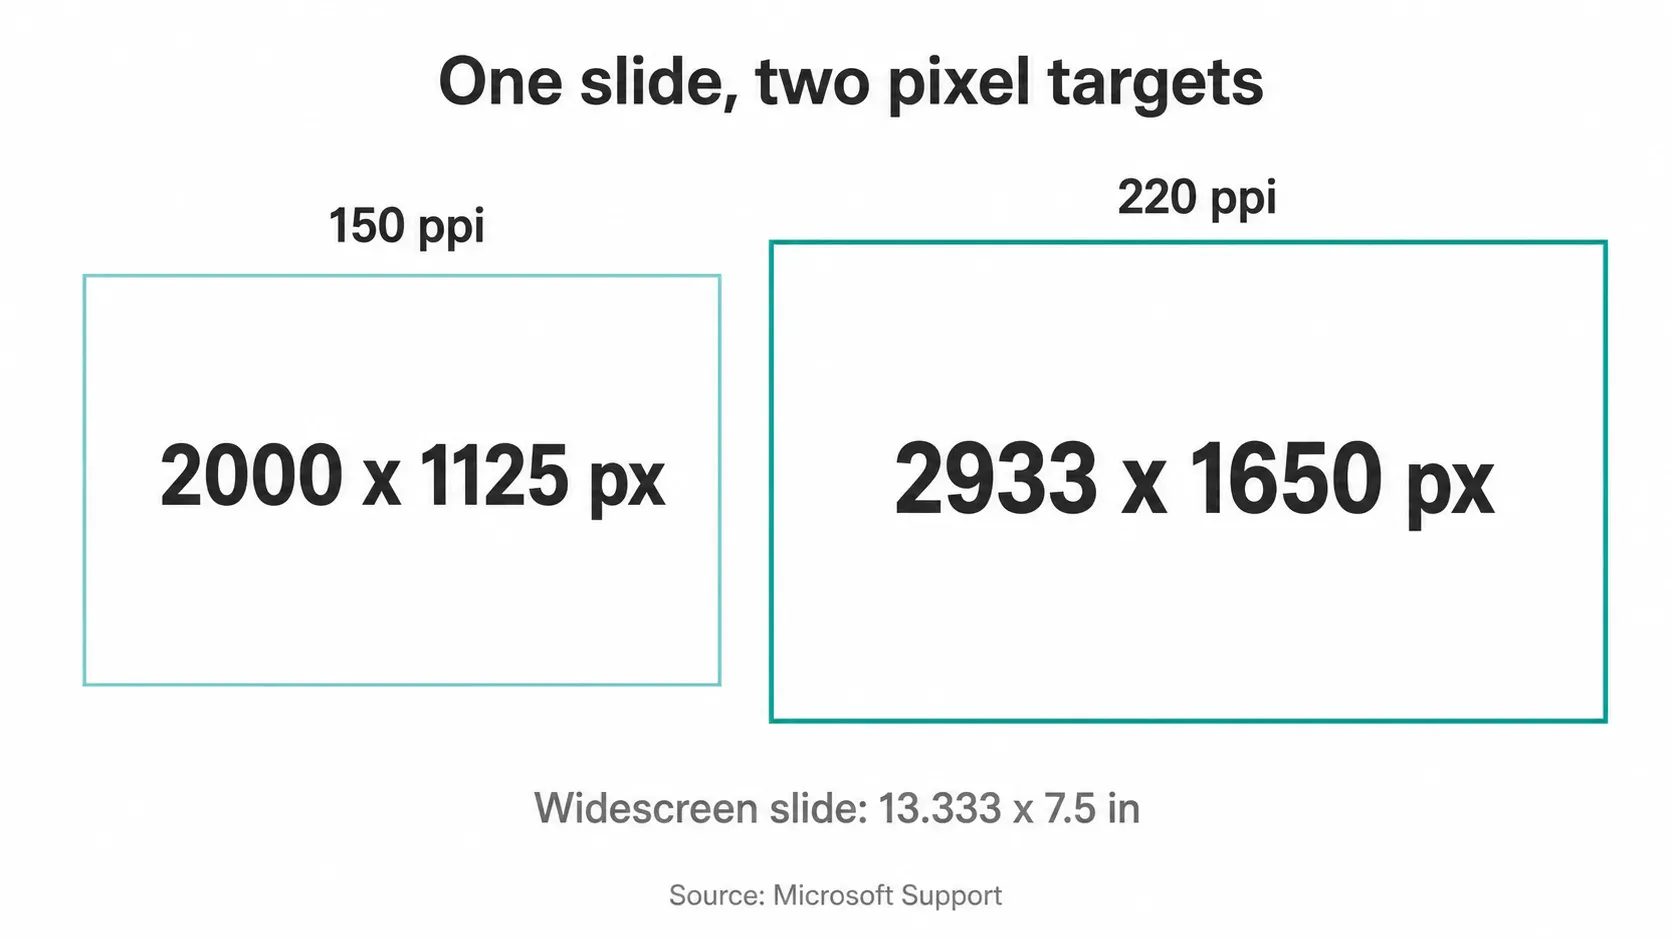
Here is the part the click-here tutorials skip: if your images already sit inside that rectangle, the button returns close to nothing, because there are no surplus pixels to throw away. In my test set the three portrait PNGs at 1536 x 2752 collapsed to 628 x 1125, since the slide is only 1125 pixels tall. The 1600 x 900 landscape files came through at their original dimensions, every pixel intact. Knowing the target also makes the export boring to set up, because you can resize to exact pixels once and reuse the number for every deck that year.
What actually moved the bytes
Twelve PNG exports, four states, measured on one machine at JPEG quality 82:
| What I did | Total | Off the original |
|---|---|---|
| Nothing, 12 PNG exports as pasted | 29.91 MB | 0% |
| ZIP the set with deflate | 29.89 MB | 0.09% |
| Fit to 2000 x 1125, keep PNG | 14.23 MB | 52.4% |
| Keep every pixel, save as JPEG q82 | 2.47 MB | 91.7% |
| Fit to 2000 x 1125 and save JPEG q82 | 1.24 MB | 95.8% |
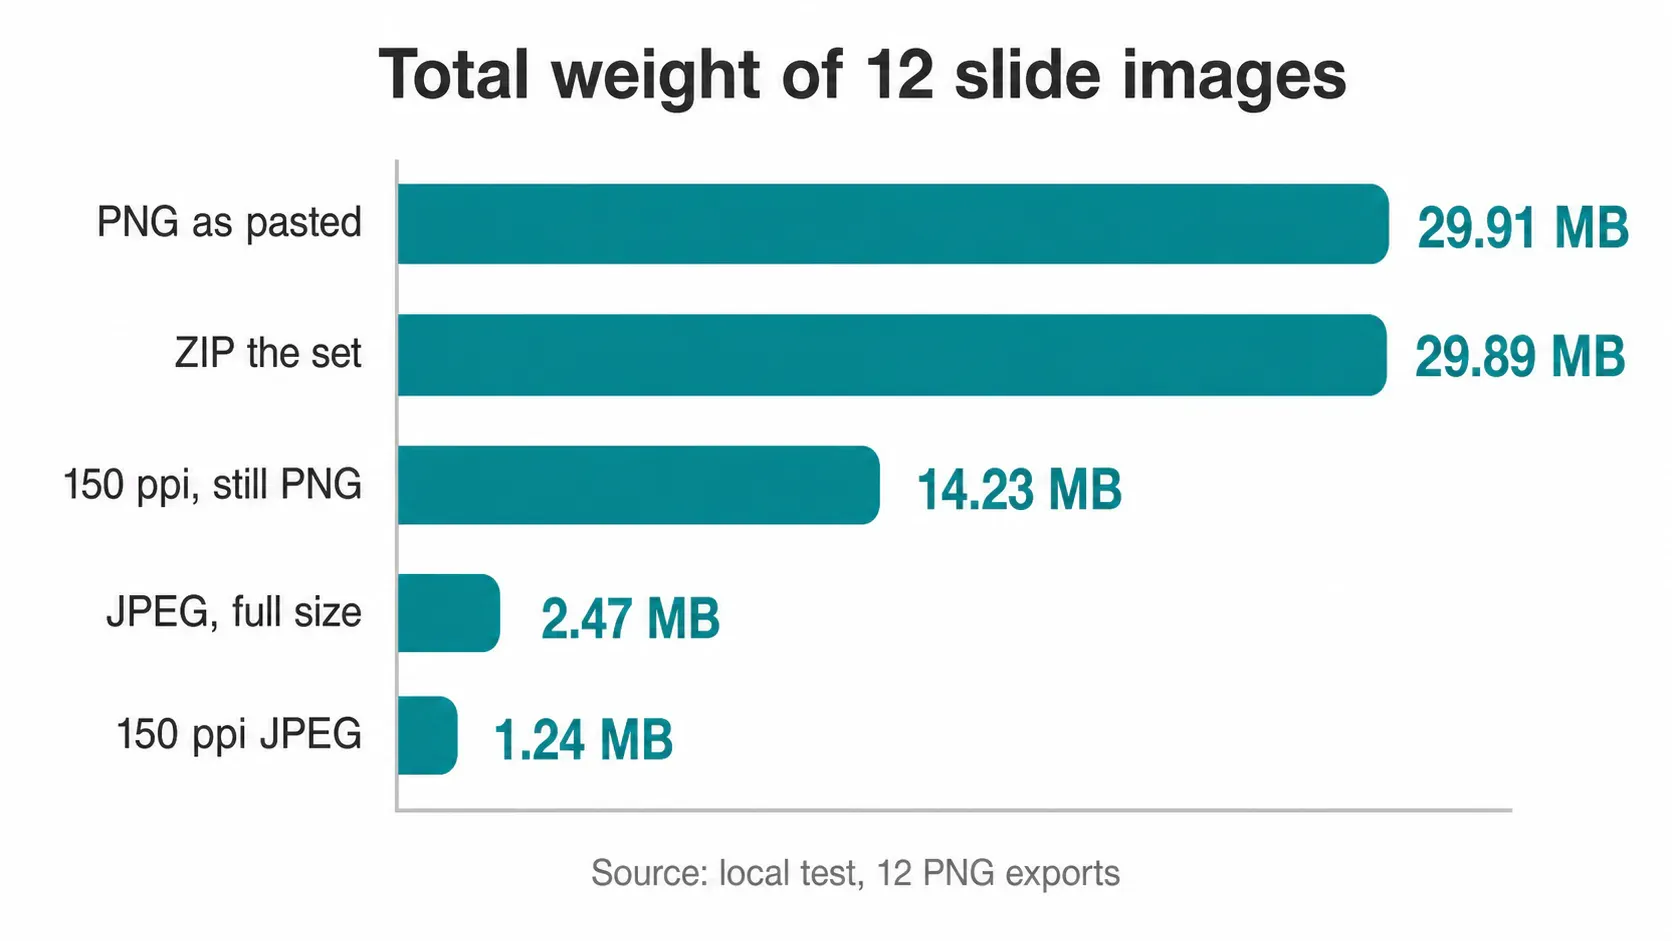
Read the third and fourth rows again. Resolution is the lever every guide reaches for, and on this set the format did the larger share of the work: keeping every original pixel and only changing the encoder took 29.91 MB down to 2.47 MB. The heaviest single file, a 6.01 MB portrait PNG at 1536 x 2752, landed at 129 KB once it was fitted to the slide height and saved as JPEG q82. That conversion took 0.01 seconds; the full twelve averaged 0.09 seconds each.
So the position I’ll defend: export at the 220 ppi rectangle rather than the 150 ppi one. The same set at 2933 x 1650 came to 1.58 MB against 1.24 MB, meaning projector and print headroom costs 0.34 MB across twelve slides (which is a rounding error next to the 29.91 MB I started with). When a hard ceiling is in play, like a mailbox that rejects anything past a fixed size, work backwards from the number instead and hit a target file size per image.
PNG on a slide: keep it or flatten it
MDN’s format guide is blunt about the split: PNG wins on “precise reproduction of source images, or when transparency is needed”, while photographs “fare well with lossy compression”. A deck usually holds both kinds on the same slide, which is why a blanket convert-everything-to-JPEG pass ruins the screenshots.
- Screenshots, UI captures, charts and diagrams with small type: keep them as PNG.
- Photos, product shots, renders, anything continuous-tone: JPEG.
- A logo that must sit over a colored background: PNG, with its alpha intact.
That third case is where decks break. Flatten a transparent logo carelessly and you get the classic black box, the same failure as when an alpha area turns black on export. Keep the alpha and shrink the transparent PNG instead. Everything photographic can go the other way, and flatten a PNG to JPG is where most of that 91.7 percent lives.
Keynote and Google Slides handle it differently
Keynote has the same idea under a different menu: File > Reduce File Size, which scales images down to “the resolution used in the presentation”. Take the Reduce a Copy option so the original survives. Then read the caveat Apple documents in the same page, that some combinations of these options make the file larger rather than smaller.
Google Slides is the odd one out. I could not find a picture-compression procedure anywhere in its Help Center, and the topic lives in community threads instead. What Google publishes the ceiling for is the conversion limit: “Up to 100 MB for presentations converted to Google Slides”. A 120 MB .pptx hits that wall before anyone gets to look at the pictures. Fixing the images before upload is the only reliable move there, and the pixel target is the same as PowerPoint’s, so you can resize to exact pixel dimensions once for both.
Sending the finished deck is its own constraint, and the same arithmetic applies to everything attached alongside it, from the one-pager to the attachment limits that started the panic. Plenty of single-purpose compressors cover that byte-level step, TinyPNG and Squoosh among them, and Araluma’s compressor handles JPG, PNG, WebP and AVIF on one screen with a live preview before you commit to the export.
A dozen slide images at 1.24 MB total is the version I’d hand a client. If your deck is still heavy after the pictures are fixed, stop clicking Compress Pictures: embedded video and fonts are the remaining suspects, and neither one is touched by the picture dialog on any of the three platforms.


